
Site Surveys
Overview
The Site Surveys sub-module in SolarCrm helps EPC vendors and project managers schedule, manage, and track surveys conducted at customer sites before installation. It ensures all technical, structural, and geographical details are recorded for accurate project assessment and planning.
Why Site Surveys?
The Site Surveys feature enables you to:
- Capture survey details like site address, roof type, and shading conditions.
- Assign surveys to specific surveyors with dates and times.
- Track survey status (Pending, Completed, Reviewed).
- Maintain a centralized history of surveys for each lead or site.
- Improve project planning accuracy with real-time survey data.
Accessing Site Surveys
- Log in to CrmLeaf.
- Expand the Solar module from the left-hand side menu.
- Click on Site Surveys.
Navigation Path
Login ➜ Solar ➜ Site Surveys ➜ Add / Edit / View / Delete Survey
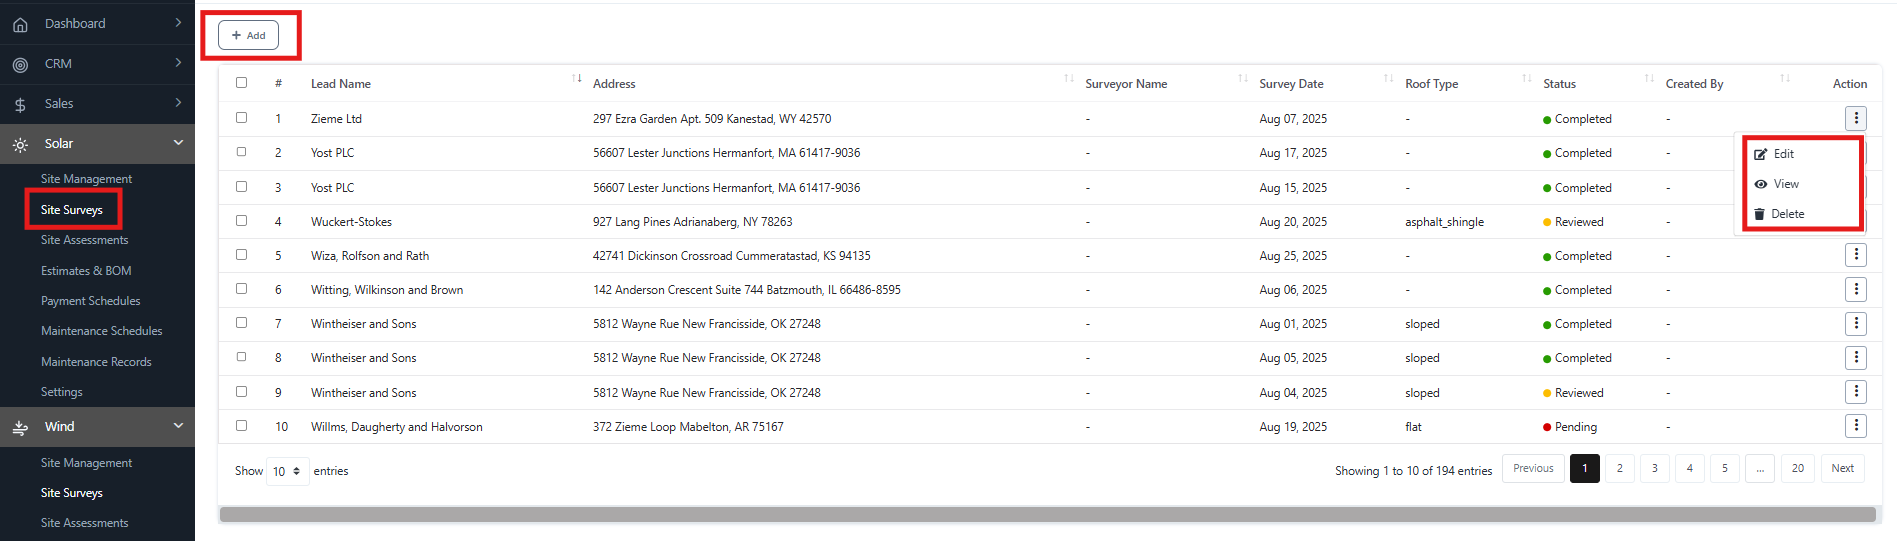
Key Fields in Site Surveys Dashboard
- # – Auto-generated serial number for quick tracking.
- Lead Name – The customer lead associated with the survey.
- Address – Location of the survey site.
- Surveyor Name – The person assigned to conduct the survey.
- Survey Date – Scheduled date of the survey.
- Roof Type – Type of roof identified (Flat, Sloped, Asphalt Shingle, etc.).
- Status – Current survey status (Pending, Completed, Reviewed).
- Created By – User who created the survey entry.
- Action – Options to Edit, View, and Delete.
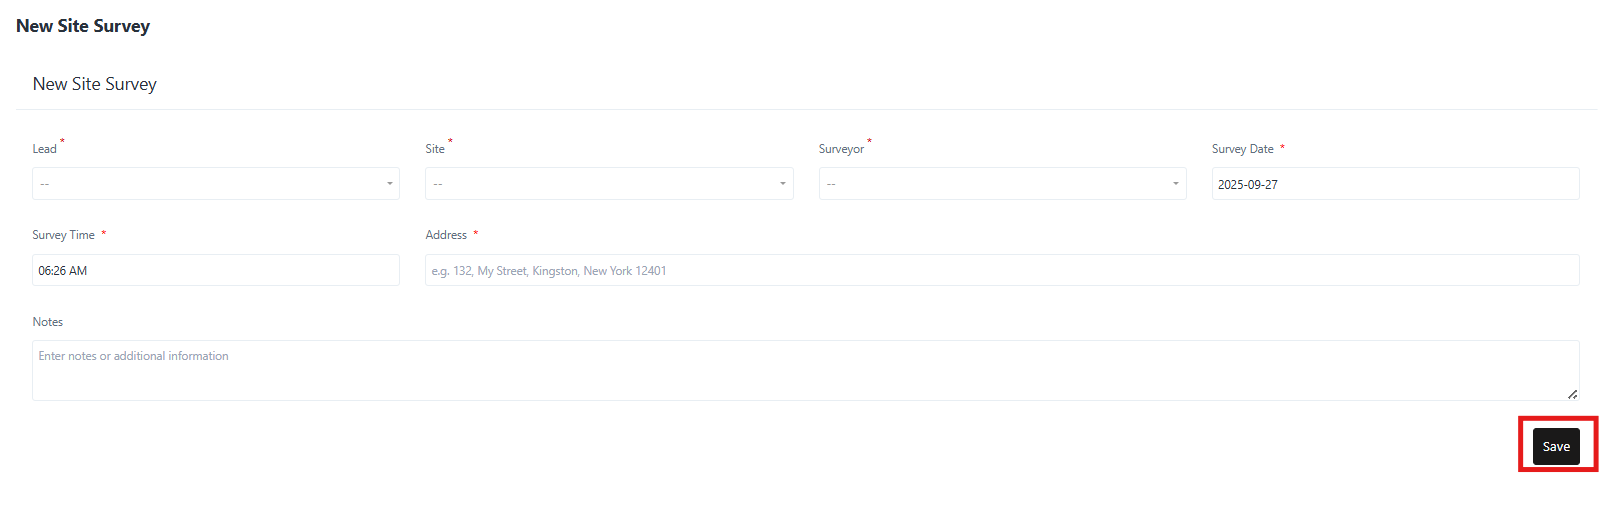
Adding a New Site Survey
- From the Site Surveys dashboard, click + Add.
- Fill in the required details:
- Lead – Select the customer lead from the dropdown.
- Site – Choose the associated site for the survey.
- Surveyor – Assign a surveyor.
- Survey Date – Enter the planned date.
- Survey Time – Enter the time of the survey.
- Address – Add the site address.
- Notes – Enter any additional instructions or remarks.
- Click Save to confirm.
Editing a Site Survey
- From the Site Surveys dashboard, open the ⋮ Action menu next to the survey.
- Select Edit.
- Update survey details such as date, surveyor, or notes.
- Click Save.
Viewing a Site Survey
- In the ⋮ Action menu, click View.
- A detailed read-only page displays all survey information, including lead, site, roof type, and survey status.
- Click Close to return to the list.
Deleting a Site Survey
- In the ⋮ Action menu, select Delete.
- Confirm deletion.
Once deleted, the survey record cannot be recovered.