
Maintenance Schedules
Overview
The Maintenance Schedules sub-module in the Solar CRM helps you plan, track, and manage maintenance activities for solar sites. It ensures preventive, corrective, and routine inspections are carried out on time, reducing downtime and extending the lifespan of solar installations.
With this feature, you can:
- Define schedules for inspection, preventive, corrective, and emergency maintenance.
- Assign tasks to responsible team members.
- Track frequency, due dates, and costs.
- Ensure timely execution of maintenance tasks.
- Export schedules for reporting and compliance purposes.
Accessing Maintenance Schedules
- Log in to CrmLeaf.
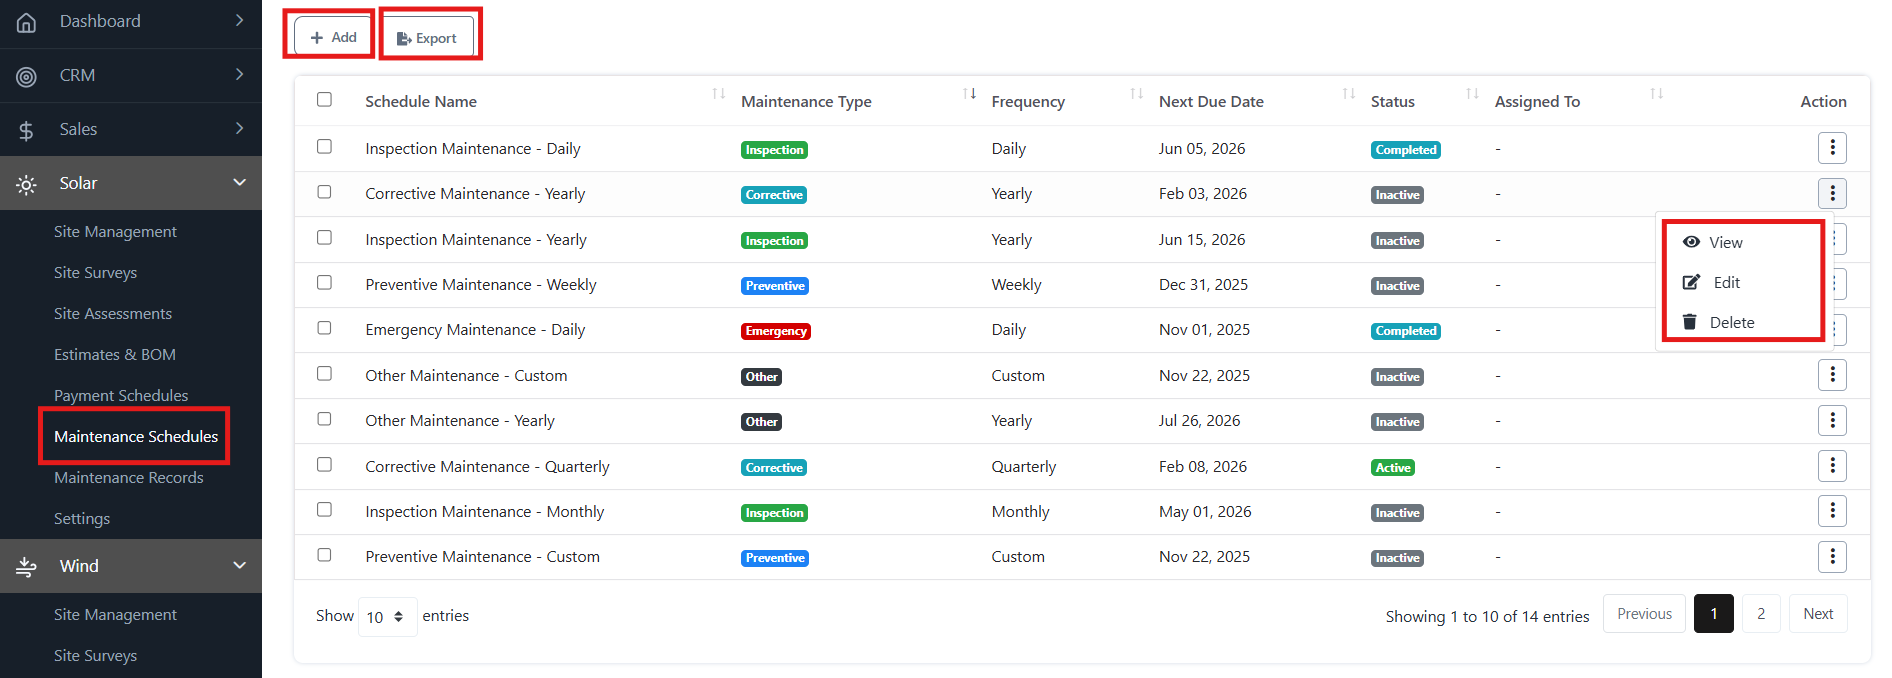
- From the left navigation panel, go to Solar → Maintenance Schedules.
- The list view will display all existing maintenance schedules with details such as Schedule Name, Maintenance Type, Frequency, Next Due Date, Status, and Assigned To.
Navigation Path
Login → Solar → Maintenance Schedules → [Add / View / Edit / Export]
Key Features
- Add New Schedule: Create a new maintenance plan by specifying project, site, frequency, type, cost, and assignment.
- Edit Schedule: Update details such as frequency, cost, or assigned personnel.
- View Schedule: Review full schedule details in a read-only mode.
- Delete Schedule: Remove schedules that are no longer needed.
- Export Schedules: Download schedules for offline analysis or reporting.
Adding a Maintenance Schedule
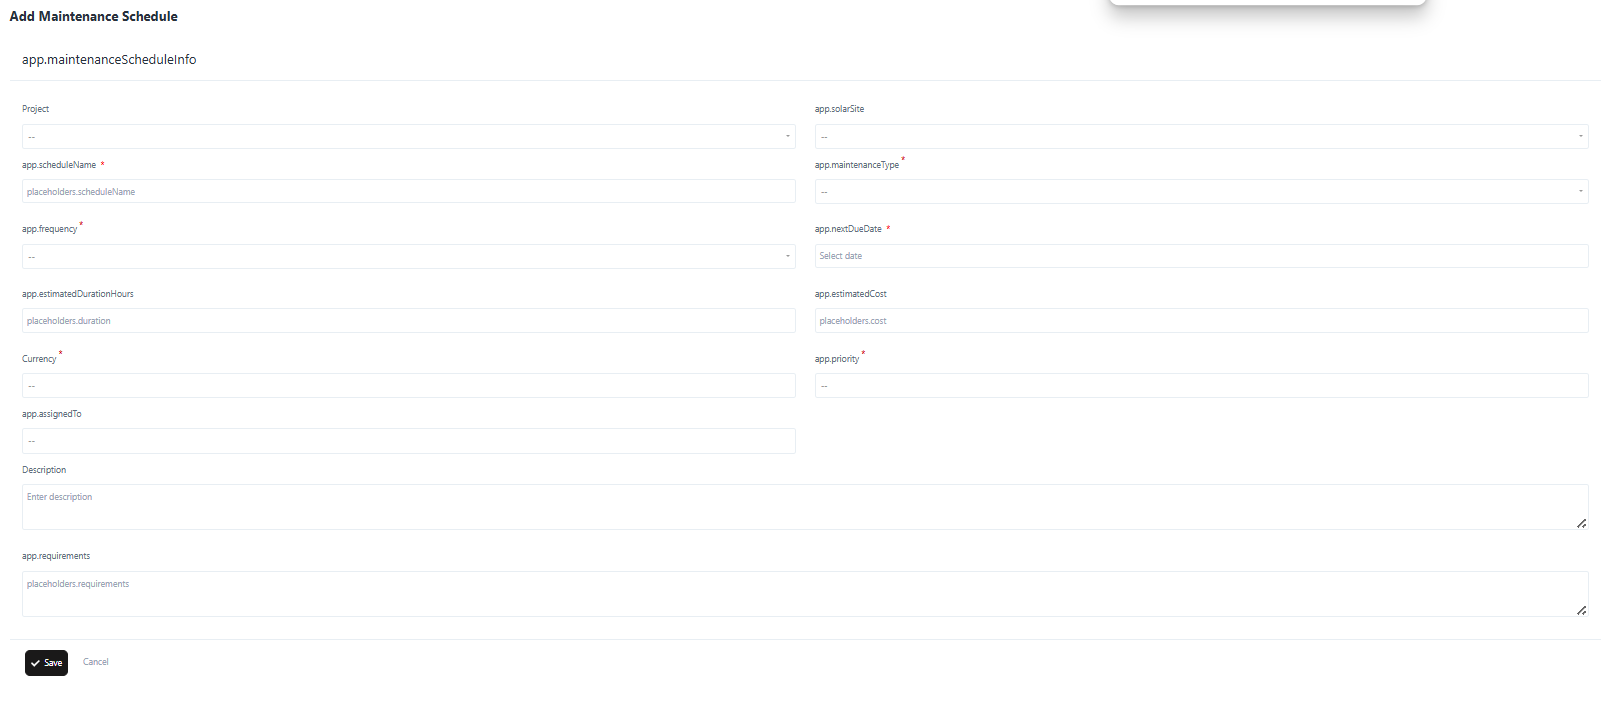
- Click the + Add button.
- Fill in the required fields:
- Project & Site – Select the relevant solar project and site.
- Schedule Name – Provide a descriptive name (e.g., “Quarterly Inspection”).
- Maintenance Type – Choose (Inspection, Preventive, Corrective, Emergency, Other).
- Frequency – Daily, Weekly, Monthly, Quarterly, Yearly, or Custom.
- Next Due Date – Specify when the next activity is scheduled.
- Estimated Duration & Cost – Enter expected hours and cost for the activity.
- Currency – Define the billing currency.
- Assigned To – Assign the task to a technician or team member.
- Priority – Select urgency (High, Medium, Low).
- Description & Requirements – Add supporting notes, safety guidelines, or equipment needs.
- Click Save to create the schedule.
Editing a Maintenance Schedule
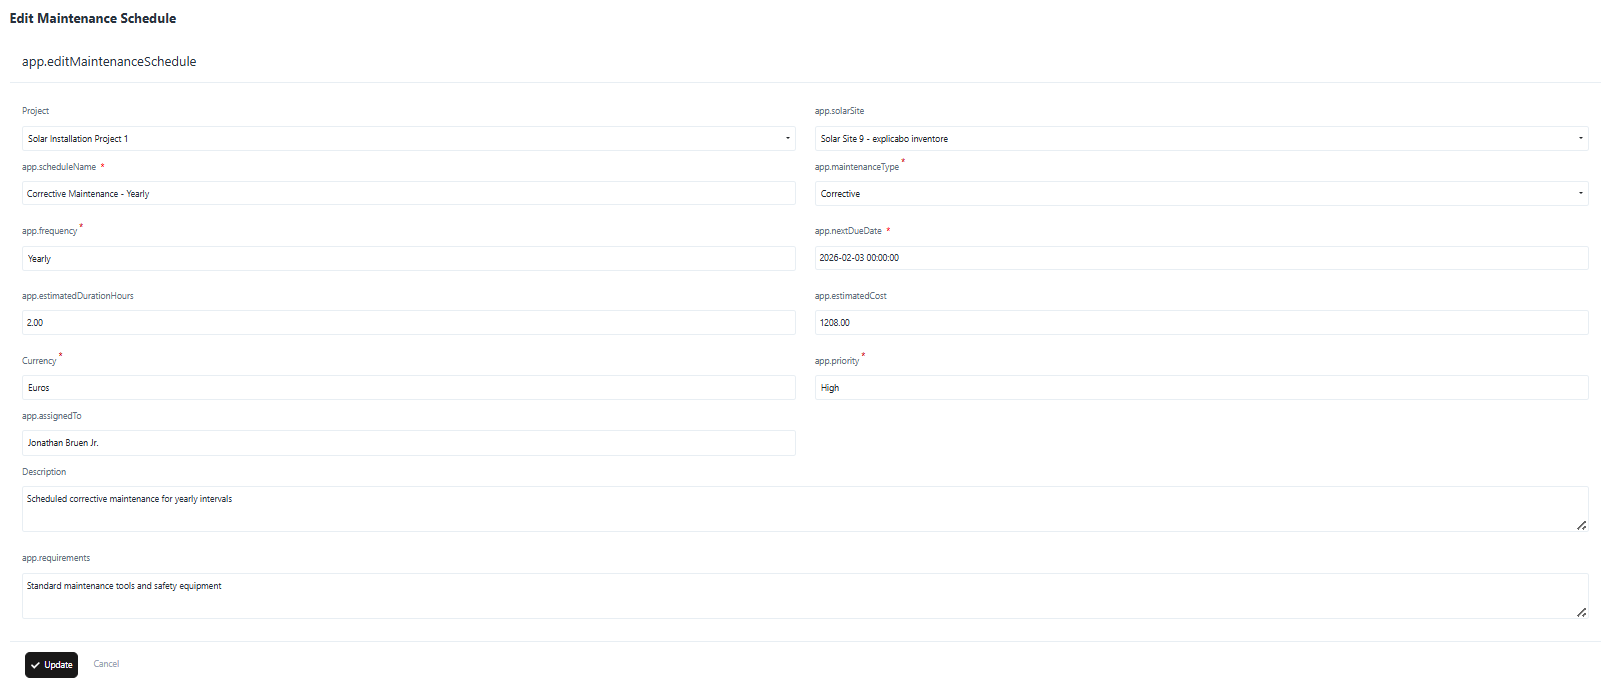
- From the list view, click the Action Menu (⋮) beside a schedule.
- Select Edit.
- Modify necessary fields such as Next Due Date, Cost, Assigned To, or Priority.
- Click Update to save changes.
Viewing Maintenance Schedule Details
- From the list view, click the Action Menu (⋮).
- Select View.
- The details page will show all entered information, including frequency, due dates, costs, and assignment.
Deleting a Schedule
- Open the Action Menu (⋮) beside the schedule.
- Select Delete.
- Confirm the action to permanently remove the schedule.