
Site Management
The Site Management section is the starting point for managing all solar projects. It provides a dashboard view of all sites along with key details such as customer name, address, installation type, status, and progress.
Navigation Path
Login ➜ Solar ➜ Site Management ➜ Add / Edit / View / Delete Site
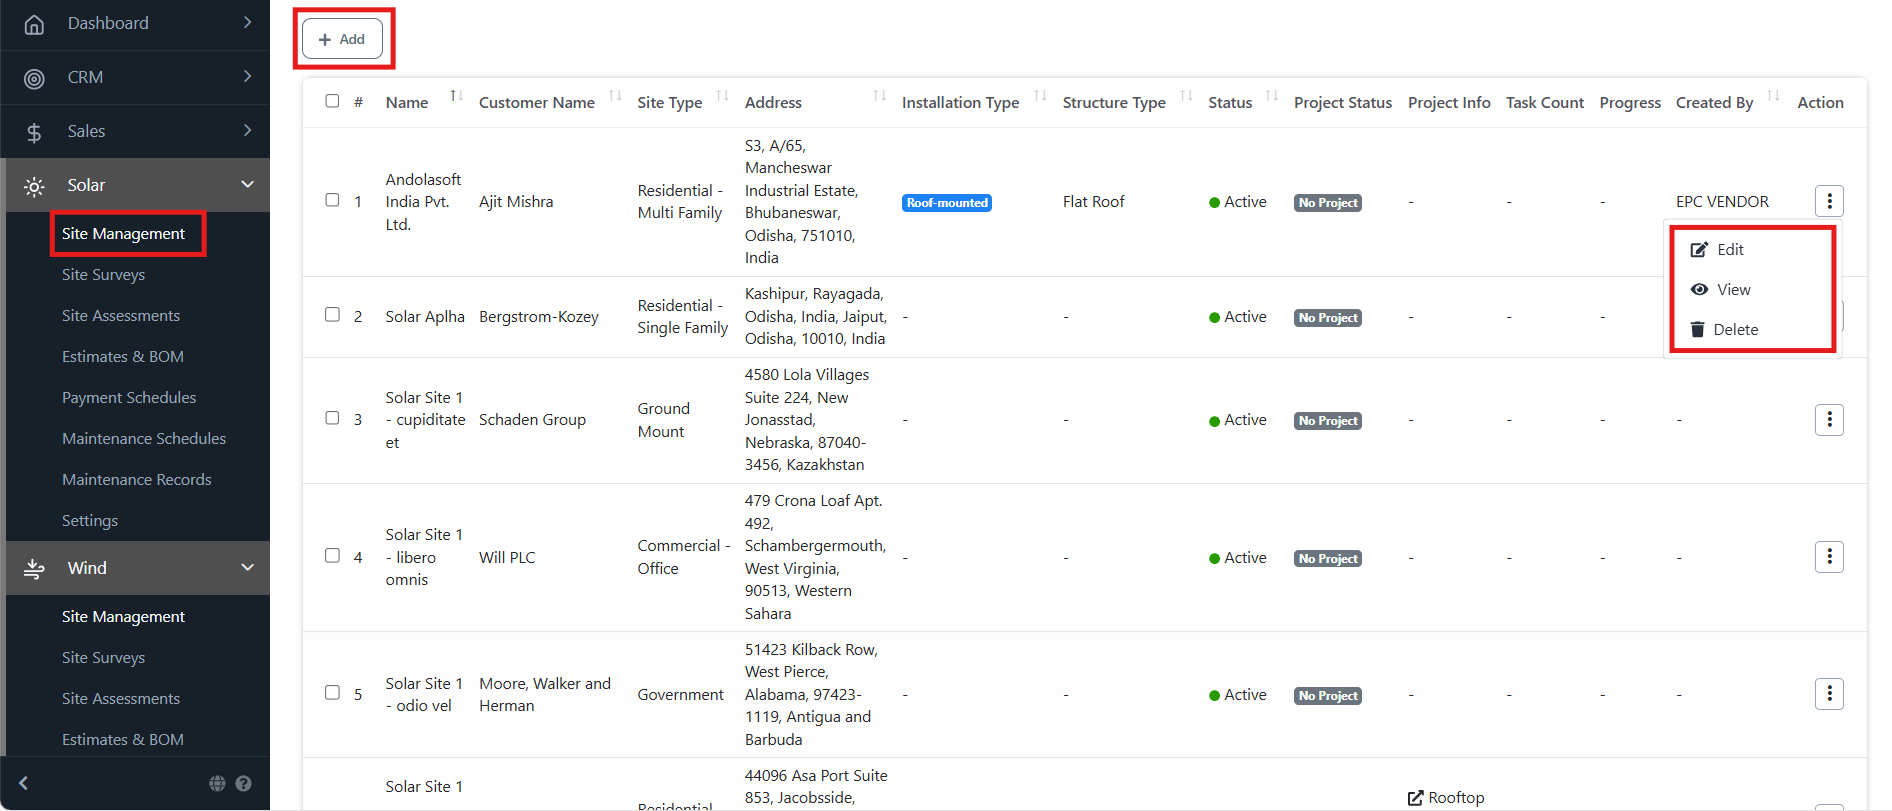
Key Fields in Dashboard
- # – Serial number of the site entry.
- Name – Site/project name.
- Customer Name – Client linked to the site.
- Site Type – Residential, Commercial, Industrial, or Government.
- Address – Site location details.
- Installation Type – Roof-mounted, Ground-mounted, etc.
- Structure Type – Roof type (Flat/Sloped).
- Status – Active or Inactive.
- Project Status – Shows if a project is linked.
- Task Count – Number of tasks associated with the site.
- Progress – % of project completion.
- Created By – The user who added the site.
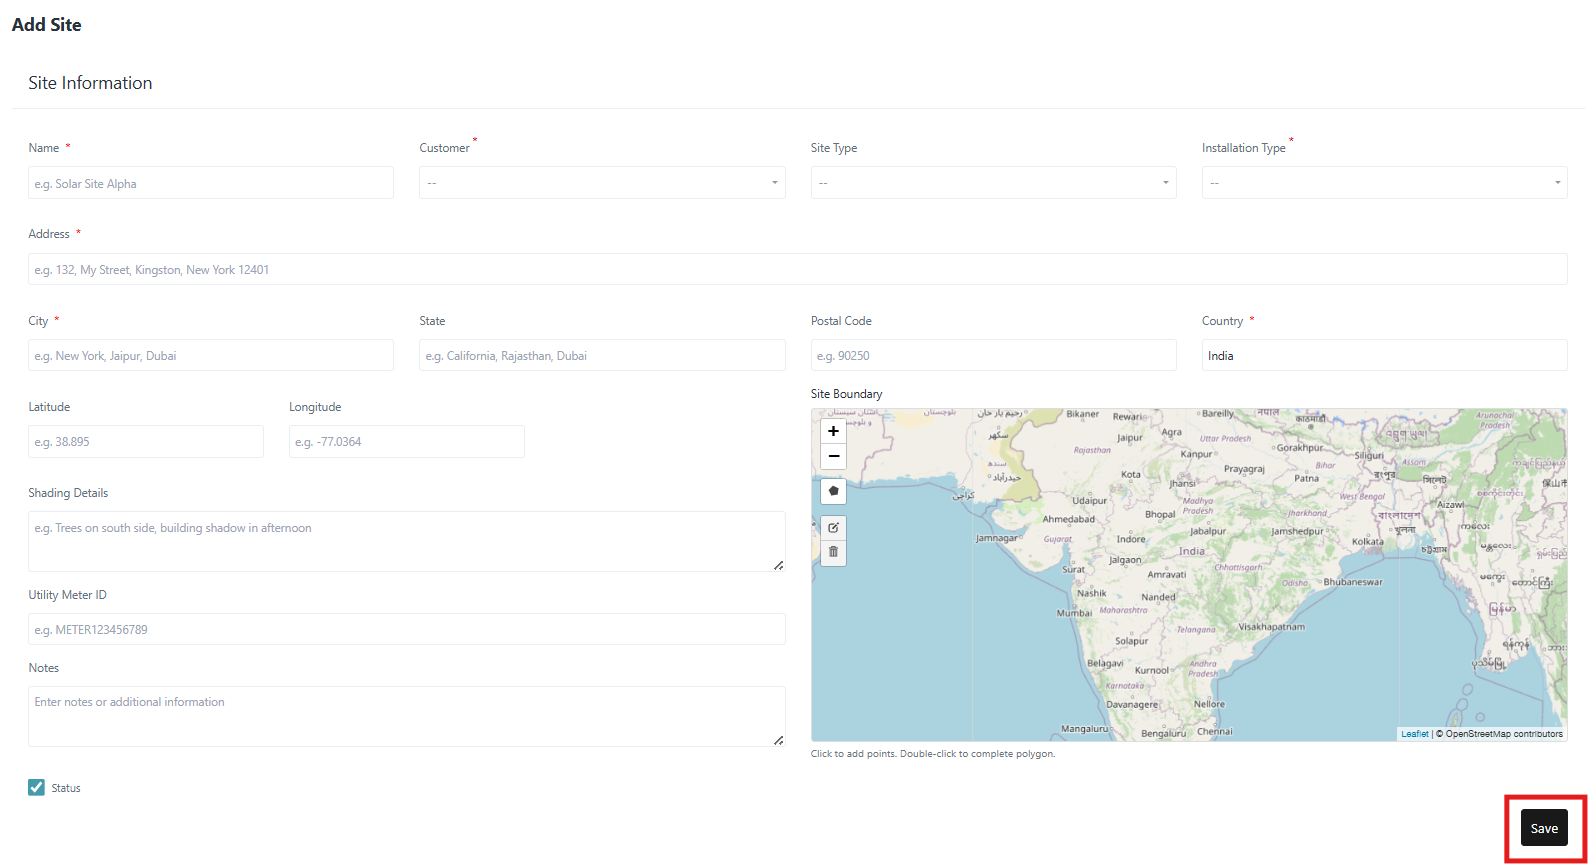
Add a New Site
- Navigate to Solar ➜ Site Management.
- Click on + Add.
- Fill in required fields:
- Name, Customer, Site Type, Installation Type, Address, City, State, Country
- Optional: Latitude/Longitude, Shading Details, Utility Meter ID, Notes.
- Use the map to mark the site boundary.
- Click Save.
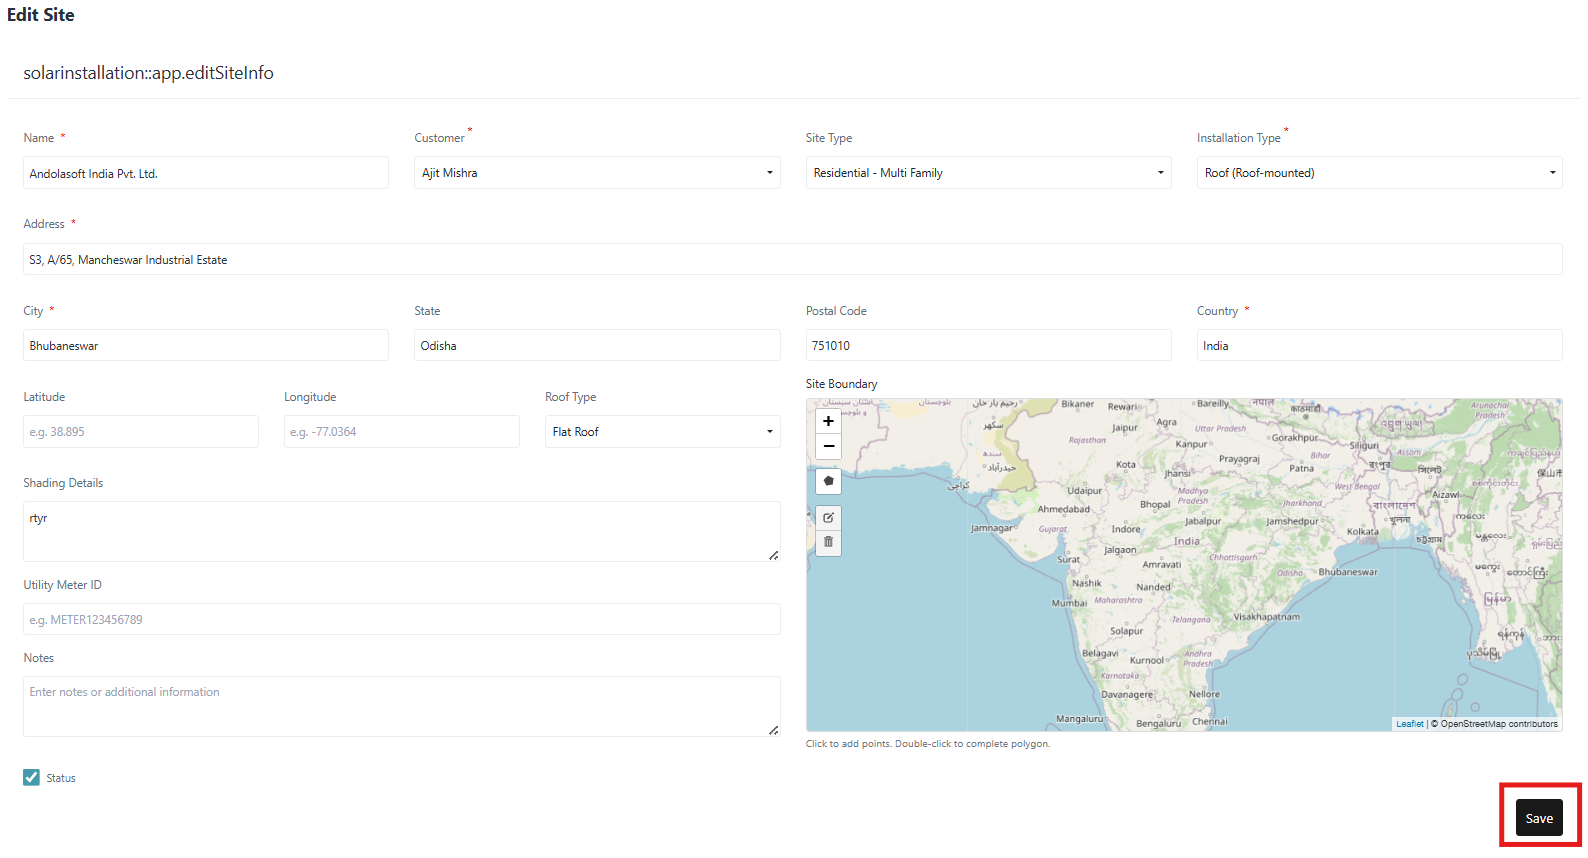
Edit an Existing Site
- Go to Site Management.
- Select the ⋮ Action menu next to a site.
- Click Edit.
- Update the site details (e.g., installation type, address, shading details).
- Click Save.
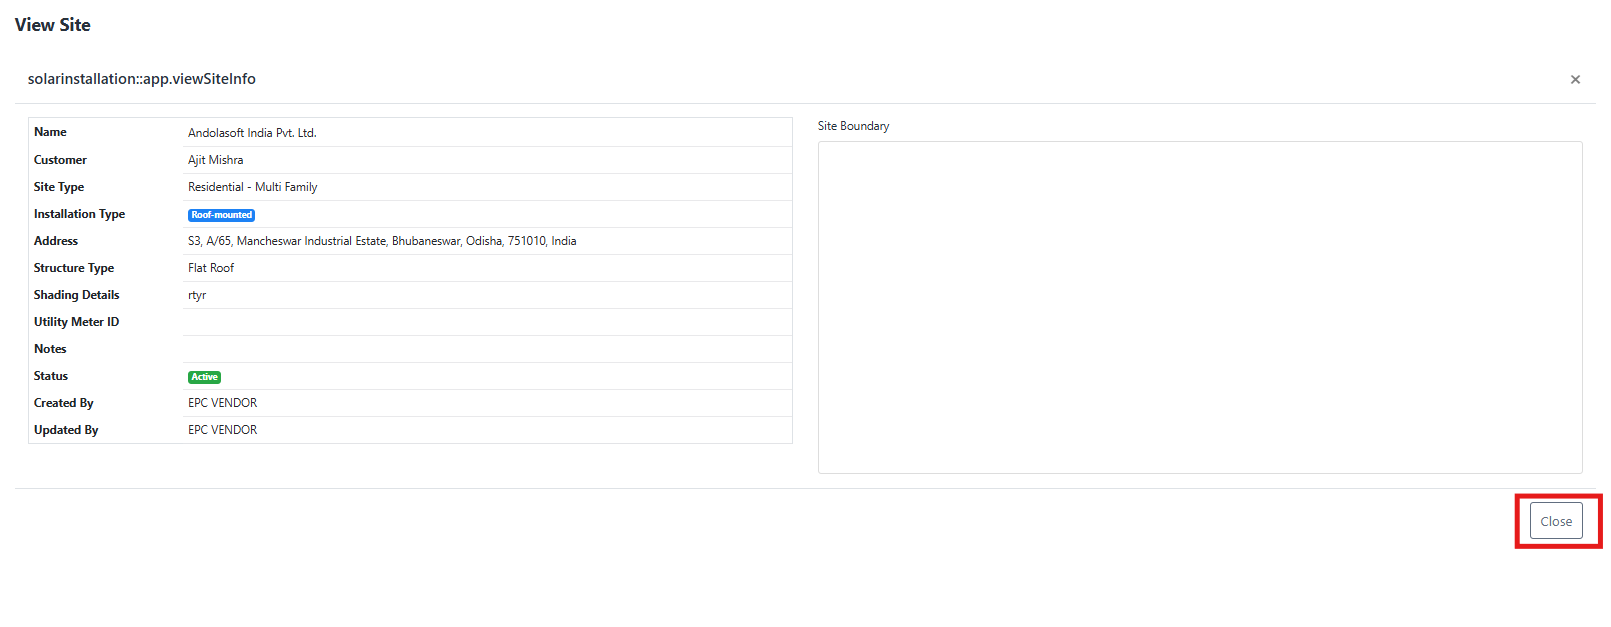
View Site Details
- In Site Management, open the ⋮ Action menu.
- Select View.
- A detailed summary of the site opens, showing:
- Customer info
- Site type and installation details
- Address and roof type
- Shading details
- Notes and status
- Audit trail (Created By, Updated By)
- Click Close to return to the dashboard.
Delete a Site
- Open the ⋮ Action menu next to a site.
- Select Delete.
- Confirm deletion.
Deleted sites cannot be restored.