
Assets
The Assets Module helps administrators manage and track assets such as equipment, tools, or items linked with projects. You can add new assets, view their details, edit existing records, or delete assets.
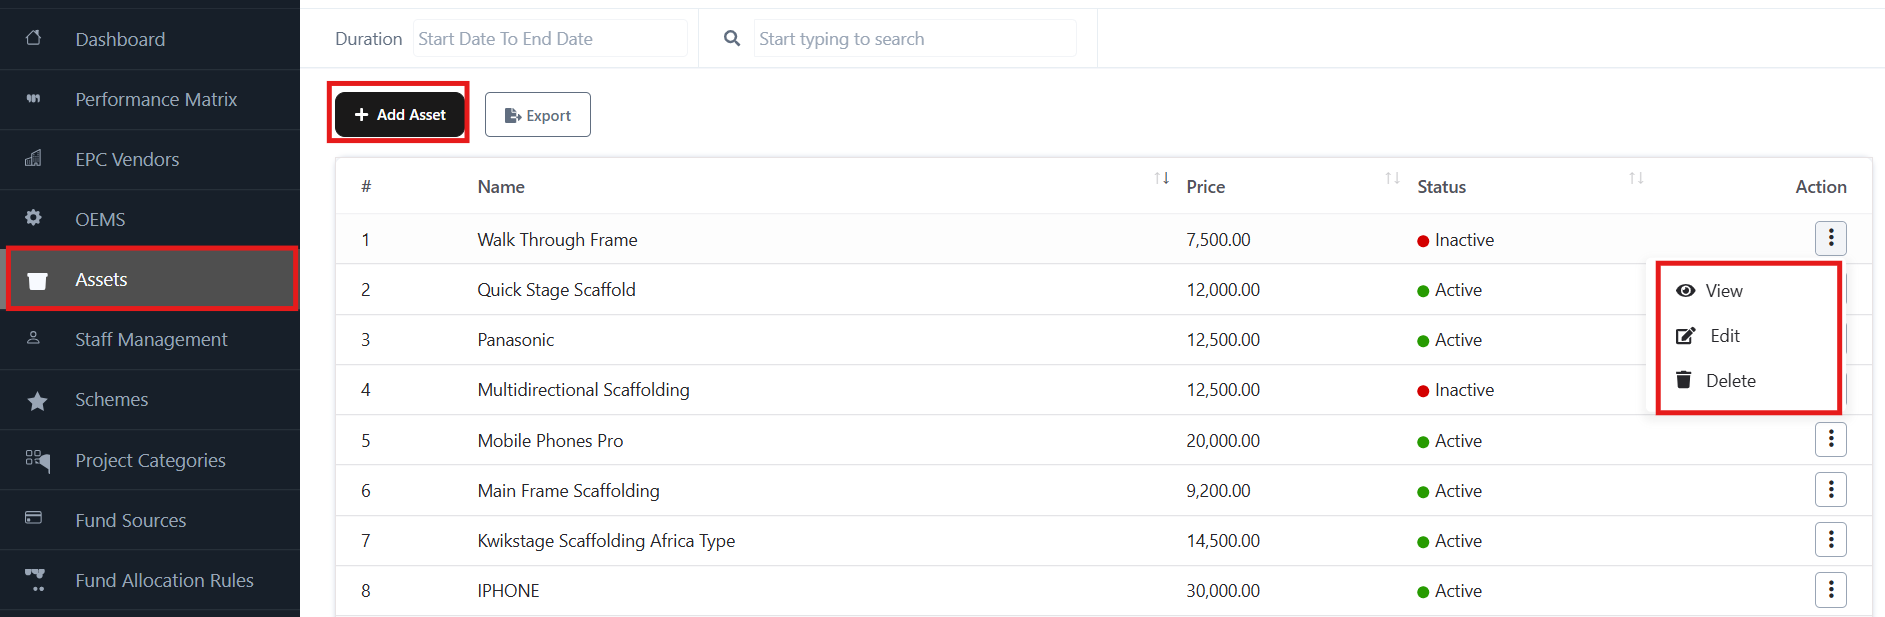
Accessing the Assets Module
- From the Admin Dashboard sidebar, click on Assets.
- The Assets list page will open, showing:
- Asset Name
- Price
- Status (Active/Inactive)
- Actions (View, Edit, Delete)
Key Features
1. Add a New Asset
- Click on + Add Asset.
- Fill in the required details in the Add Asset Form:
- Name (mandatory): Enter the asset name.
- SKU: Unique identifier for the asset.
- Price (mandatory): Asset cost.
- Purchase Price: Cost price of the asset.
- HSN/SAC Code: Tax classification code.
- Type: Select asset type (e.g., goods).
- Status: Active or Inactive.
- Opening Stock: Initial stock quantity.
- Rate per Unit: Enter if applicable.
- Allow Purchase: Choose Yes or No.
- Track Inventory: Select Yes or No.
- Description: Add a detailed description.
- Click Save to create the asset.

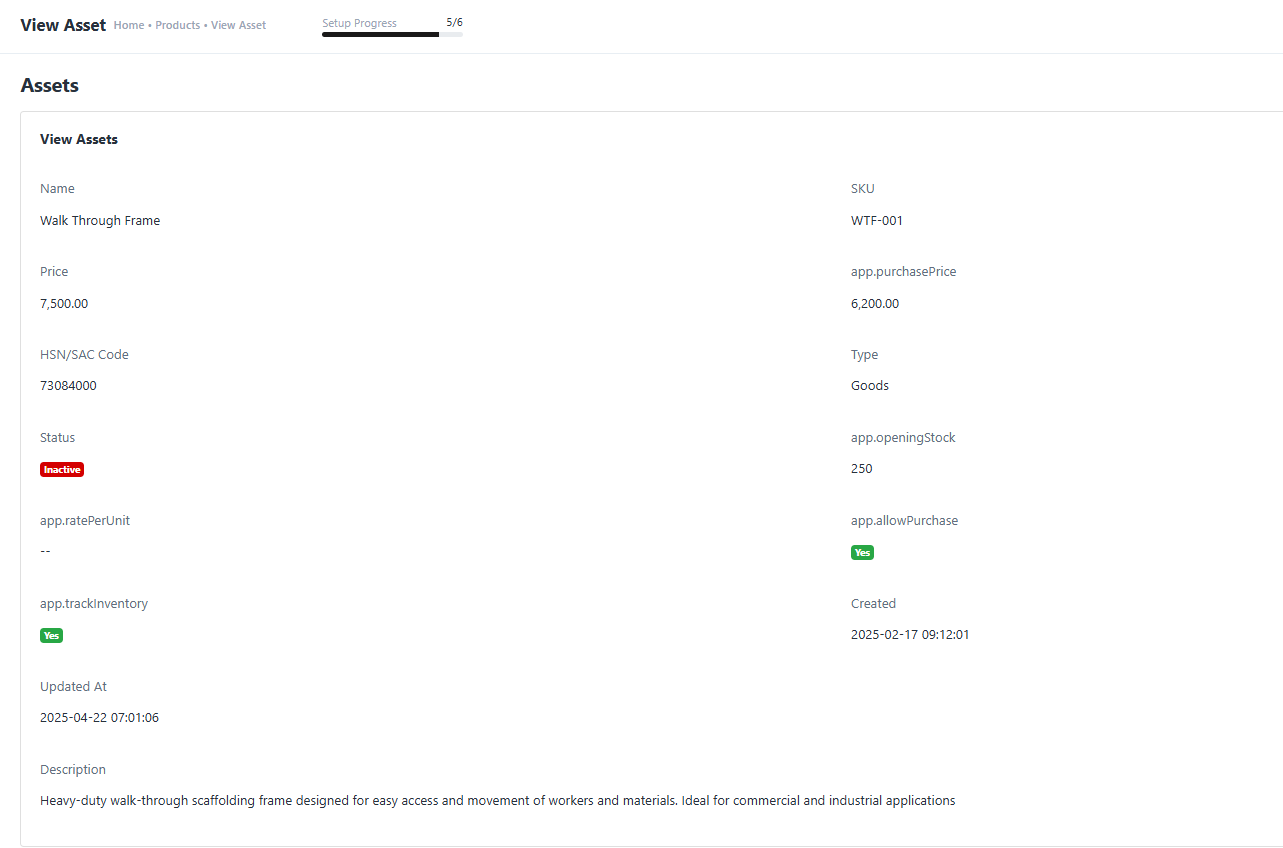
2. View Asset Details
- In the Assets list, click the Action (⋮) menu > View.
- You will see full asset details, including:
- Name, SKU, Price, Purchase Price
- HSN/SAC Code, Type, Status
- Opening Stock, Rate per Unit
- Allow Purchase / Track Inventory
- Created & Updated timestamps
- Description
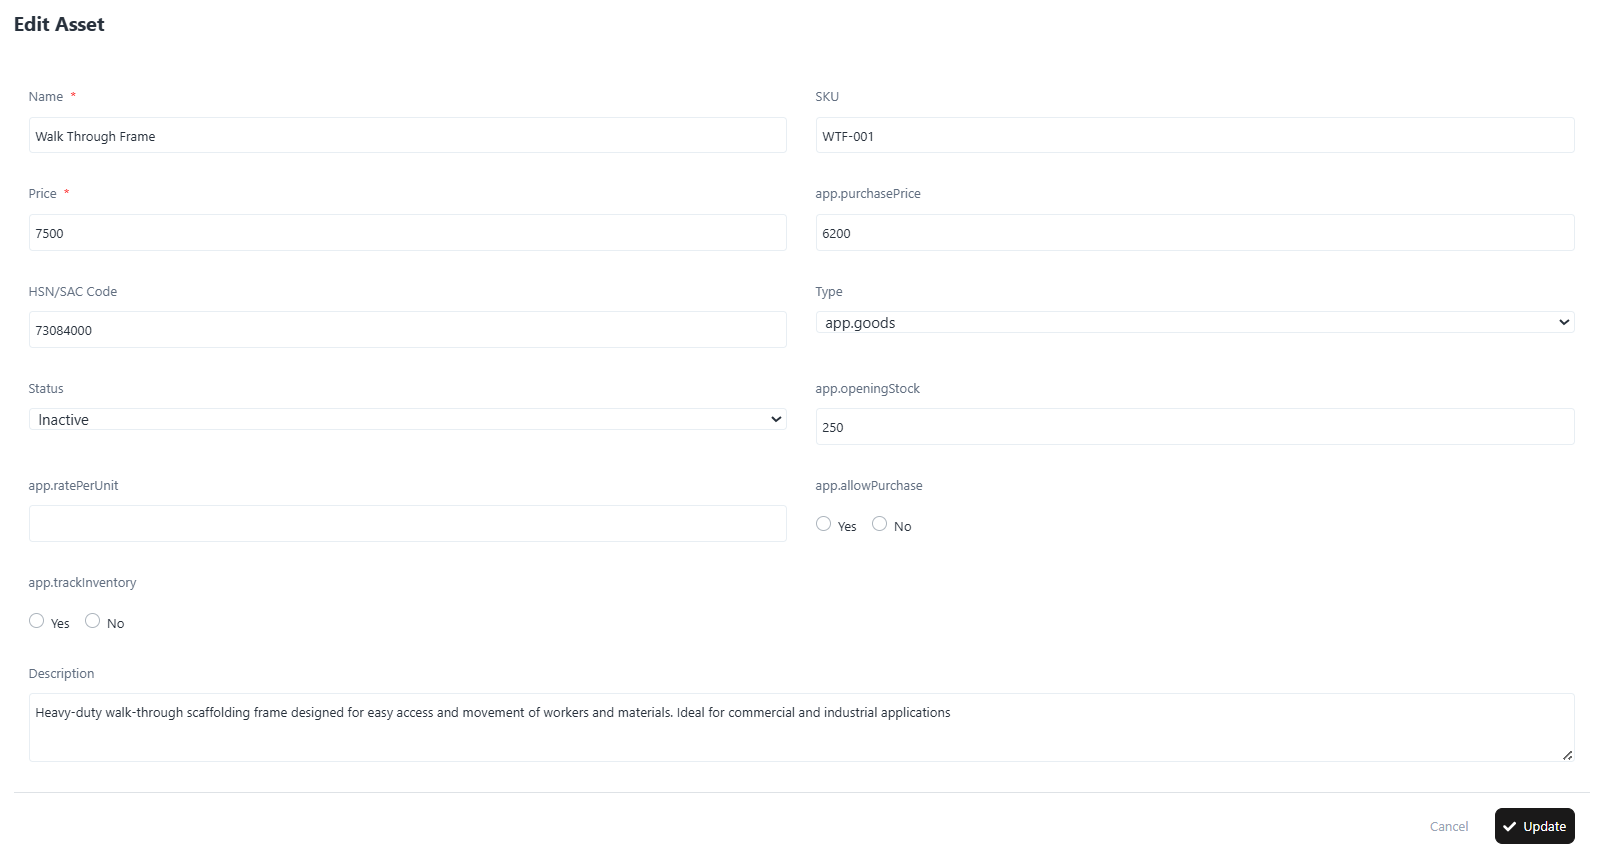
3. Edit an Asset
- From the Assets list, click the Action (⋮) menu > Edit.
- Modify the fields as required (e.g., price, stock, status).
- Click Update to save changes.
4. Delete an Asset
- From the Assets list, click the Action (⋮) menu > Delete.
- Confirm the deletion.
Note: Deleted assets are permanently removed and cannot be recovered.
5. Export Assets
- Click Export to download the list of assets in a structured file format (CSV/Excel).
Quick Navigation
- Assets List Page → Manage and view all assets.
- + Add Asset → Create new assets.
- View → Detailed record of an asset.
- Edit → Modify asset details.
- Delete → Remove assets permanently.