
Installation Types
Overview
The Installation Types section in the Solar module allows you to manage different types of installation categories, such as roof types or ground-mounted systems. This helps standardize site assessments and ensures accurate project planning.
With this feature, you can add, edit, or delete installation types according to your project requirements.
Accessing Installation Types
- Log in to your application.
- From the left-hand menu, go to Solar ➜ Settings.
- Click on Installation Types.
Navigation Path
Login ➜ Solar ➜ Settings ➜ Installation Types ➜ Add / Edit / Delete
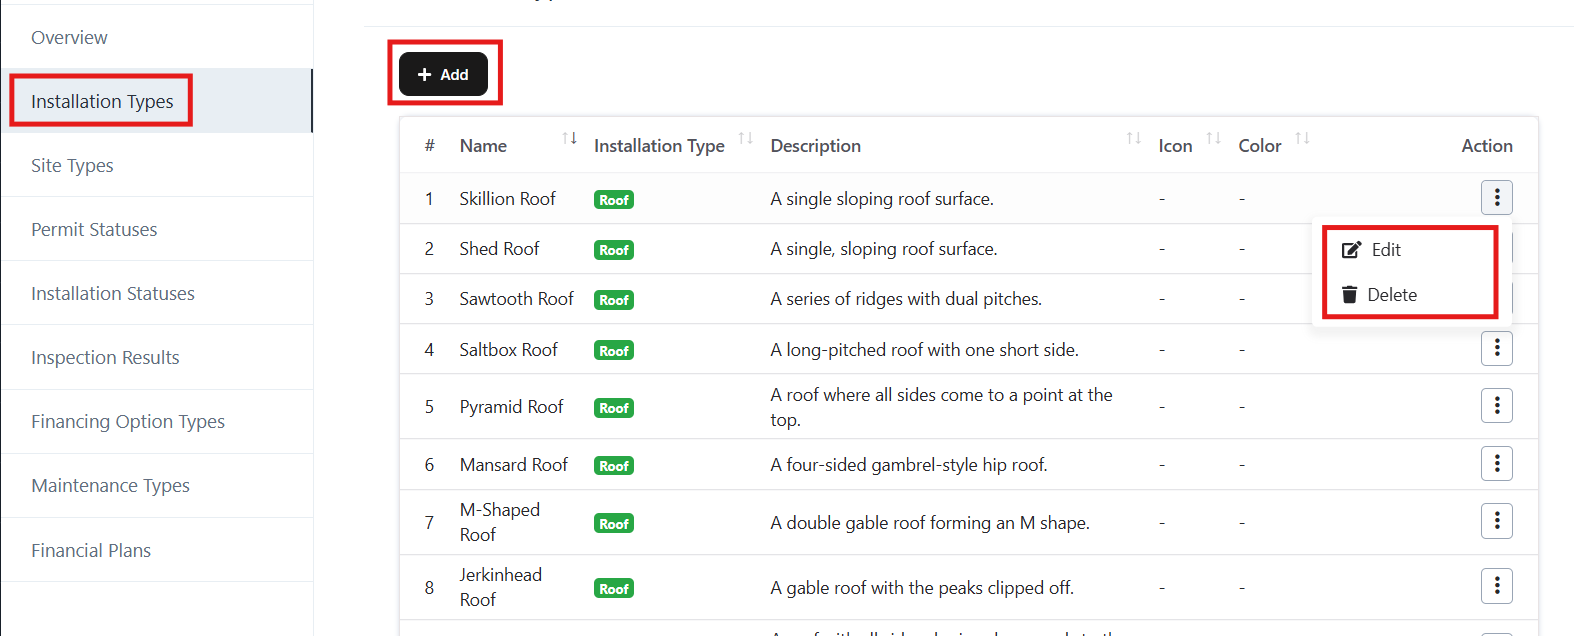
Installation Types – Actions
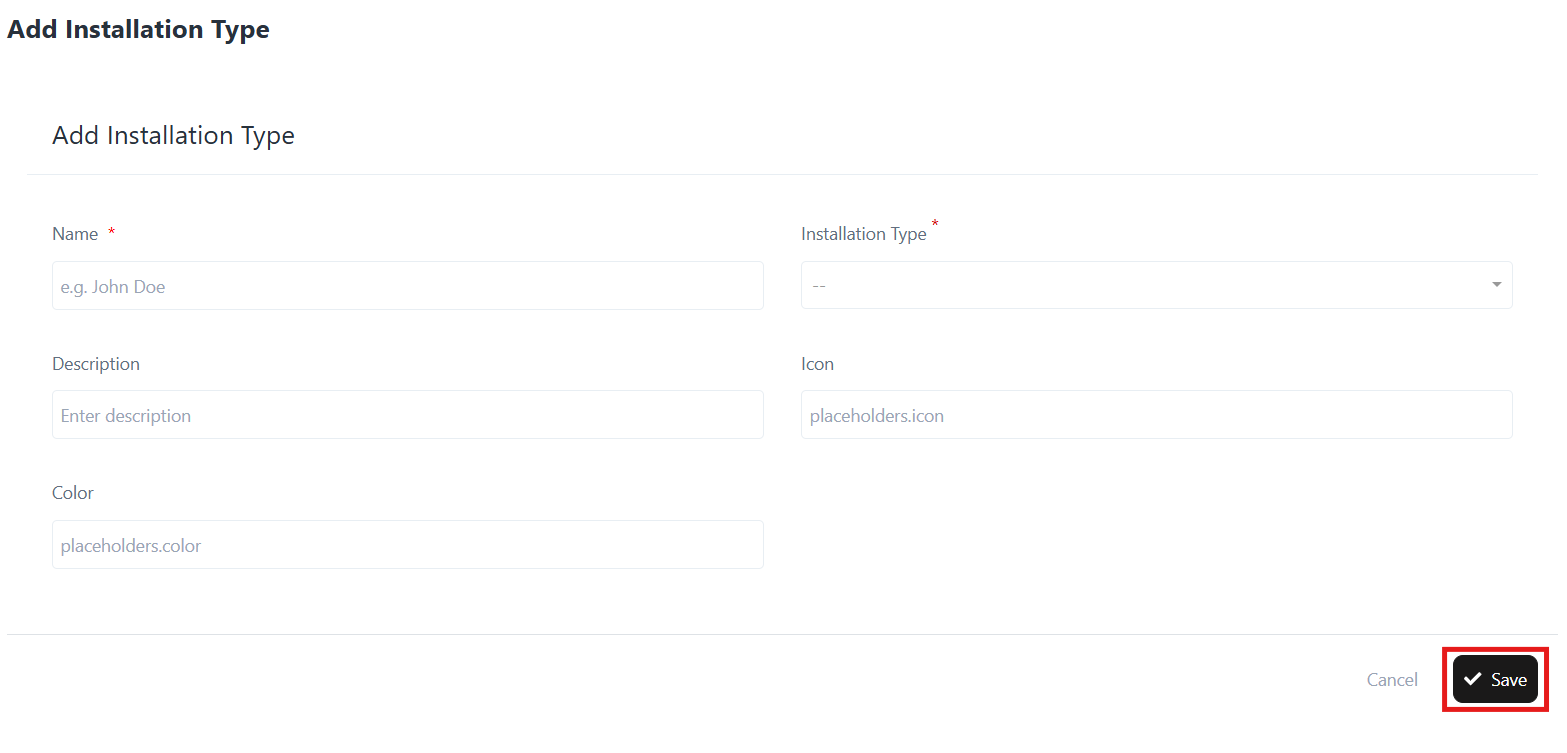
1. Add New Installation Type
- Click on the + Add button (top-left).
- A form will open (see screenshot).
- Fill in the following details:
- Name – Enter the name of the installation type (e.g., Skillion Roof).
- Installation Type – Select type (e.g., Roof, Ground Mount).
- Description – Provide a brief description of the installation type.
- Icon – (Optional) Upload/define an icon for quick identification.
- Color – (Optional) Assign a color for better visualization.
- Click Save to create the new installation type.
Example:
Name: Skillion Roof
Type: Roof
Description: A single sloping roof surface.
2. Edit Installation Type
- In the Installation Types list, click the three-dot menu beside the record.
- Select Edit.
- Update the fields such as Name, Type, Description, Icon, or Color.
- Click Update to save the changes.
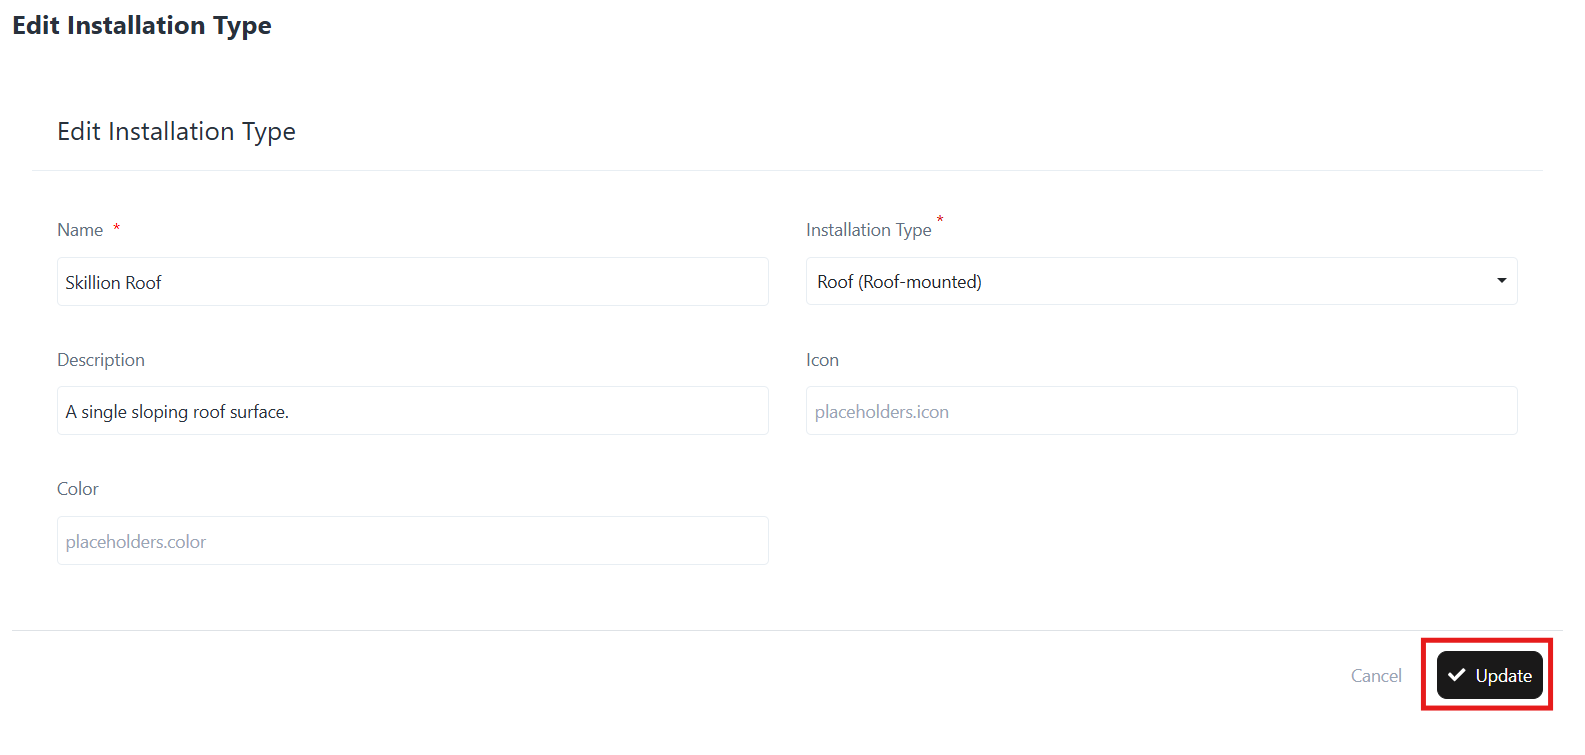 Example Update:
Installation Type: Roof (Roof-mounted)
Description: A single sloping roof surface.
3. Delete Installation Type
- In the Installation Types list, click the three-dot menu beside the record.
- Select Delete.
- Confirm the deletion.
Note: Deleted installation types cannot be recovered.